f-log

just another web log

22 Nov 2015:
so I managed to uninstall gcc
I while back I managed to uninstall python which is critical for building packages on Gentoo

You know whats even more important than Python? GCC the compiler, but none the less I managed to uninstall it.

To be fair the emerge -a --depclean did say it was going to remove one version of gcc and preserve the other.

But without gcc I could not build anything, even gcc.
emerge -avDNut world
revdep-rebuild
emerge gcc

all failed
and gcc-config -l
said the profile was invalid.

But I did find other people who had managed this terrible feat and all that is needed is a quickgcc-config 1

and when I say quick I mean slow because it rebuilds and rebuilds and rebuilds.
note: that's a "1"(one) not an "l"(lowercase L)

But its fixed now!
11 Nov 2015:
Completly unsafe ssvnc password hack
A quick follow-up to the VNC Windows screen mirrored on Raspberry Pi post.

I needed the ssvncviewer to start automatically on boot and that meant either disabling the VNC server password or passing the password into ssvncviewer.

The documentation says to use vncpasswd to generate a password file but I could not get vncpasswd installed. There is a nice completely unsafe hack.
echo passwordstaplebattery | ssvncviewer -autopass -fullscreen -scale 0.6 192.168.50.1
That's right, pipe it in from an echo.

Apparently the whole point of ssvnc is to allow SSL/SSH connections, but I am lazy and the client is happy that all connections are inside a private network.

And I know there are too many icons on that Windows desktop. It's Windows, what did you expect?
11 Nov 2015:
VNC scaling windows on Pi madness
OK so in the last post we got the new Raspberry Pi 7" Touch screen working in Raspbian Jessie.

I installed TightVNC server on the Windows machine and installed the tight vnc viewer client on the Pi
sudo apt-get install xtightvncviewer
ran it with the IP address of the Windows machine
xtightvncviewer -fullscreen 192.168.50.1
and it works!! cool!
(if you are executing GUI apps via ssh then you need to set DISPLAY first)
export DISPLAY=:0.0

Hang on, its only showing the top left 800x600 pixels of the Windows machine, where is the scaling options? Sadly there aren't any! New plan, Google shows UltraVNC supports scaling. Install ... nope no scaling options, do I have to move from VNC to RDP? Not yet!

TightVNC has been forked into ssvnc and that supports scaling.
Is it on Raspbian Jessie? Lets check
apt-cache search vnc
it is!
sudo apt-get install ssvnc
The ssvncviewer man page and help screen both say you can "auto" scale and "fit" to screen but each time I tried I got scaling not supported. Manually setting the scaling worked though.
ssvncviewer -fullscreen -scale 0.5 192.168.50.1
Scaled but too much, image of the Windows machine is too small
ssvncviewer -fullscreen -scale 0.75 192.168.50.1
Now we are missing the bottom of the Windows screen
ssvncviewer -fullscreen -scale 0.65 192.168.50.1
um, nothing displayed
ssvncviewer -fullscreen -scale 0.6 192.168.50.1
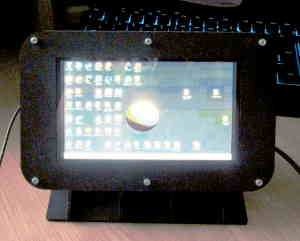
Ah, perfect
Pi touch screen using ssvnc to show Windows desktop scaled

Job done!
11 Nov 2015:
Raspberry Pi touch screen and stand setup
Somebody wanted to mirror their Windows desktop in a read-only manor as simple calendar display for another room. They wanted to buy a cheap PC and monitor but I steered them to a Raspberry Pi 7" Touch screen. They ordered the bits, including power, WiFi and case/stand. I then put it together.

The main screen instructions and information are here and the stand was from ModMyPi with details on their blog. The build was a little nerve racking, what with all the bare circuit boards, wires and ribbon cables. Apart from one step implying the ribbon cable should be in further than it can go, it was straight forward. I went with the GPIO pins powering the screen instead of another external power supply.
side view of the modmypi stand

side view of the ModMyPi stand

First shock was the display not even powering up, but this was resolved with a quick
sudo apt-get update
sudo apt-get upgrade
sudo shutdown -r now

FYI this was running on a Raspberry Pi 2 B with Raspbian Jessie.

The display is crisp, clear and vibrant if a little on the small side. As with any small touch screen the control is quite hit and miss with my giant fingers, but that was never the intention.

The ModMyPi display case was easy to put together and I loved that it came with so many extra bits including a completely clear front option vs the black acrylic. You can hang it on the wall or use the desk stand. The one thing letting it down is the silver screws showing on the front. A minor cosmetic issue and something I hope they can resolve in the future.

Although I had no intention of using the USB ports I found I had to swap the Wifi dongle(had to borrow one before the official one came into stock) and a USB keyboard and mouse. This presented quite a challenge as the case makes the available finger space very tight and when I added the micro SD card it took multiple tries. Once everything is setup that should not be an issue.

One more step before we go any further. Make sure you run
sudo raspi-config
and in the Advanced section Disable Overscan or you will have 0.6cm black borders.

In the next post I will install VNC servers and clients
11 Nov 2015:
pizza box monster face windows
Halloween! AGHHHhhh completely forgot! erm what to do? No pumpkins, nothing but the pizza boxes from the previous night.

Snip snip snip, cut cut cut. Instant monster house!
pizza box based silhouettes make monster face in window at night with back lighting
01 Nov 2015:
blender monkey lattice 4x movie time
I saw a great straight forward Blender Lattice tutorial over on the awesome Blender Nation and knew I would have to try it out.

3D lattices allow you to warp the space around and affect a set of vertices. The easiest way of visualising the result is a Lattice in the shape or an hour glass on its side. As the vertices approach they are concentrated more and more at the "waist" of the hour glass and then expanded as the leave the other end.

So for the following animation I simply created a Monkey and cuboid lattice. Applied the lattice to the Monkey and shrunk and twisted the top of the lattice. Then it was just a simple matter of moving head to below the lattice and adding a key frame at position 0 and then moving above it and setting a key frame at 250, Blender does the rest.

I wanted to visualise the lattice transform but lattices are invisible so I added a cube. Subdivided it and twisted and shrunk its top to match. Then I added a Wire frame modifier and you can see the edges. It is not perfect, the real lattice has internal vertices and the cube only shows the outer ones on the "skin". Finally I rendered four movies from different view points, added four planes and set the texture to be the animations. Probably the least efficient way of doing it but it works.


https://youtu.be/fmh7ZGkPvS4 (rendered in Cycles and the video has no audio)

To get the sped up video I ran
ffmpeg -i monkey_normal_speed.mpg -vf setpts=0.5*PTS /tmp/monkey_double_speed.mpg
and to make YouTube like the fact I had literally "catted" the two movies together I ran
ffmpeg -i /mnt/sdb4/videos/blender_monkey_lattice.mpg -c:v libx264 -preset slow -crf 18 -c:a copy -pix_fmt yuv420p blender_monkey_lattice.mkv
loading results, please wait loading animateloading animateloading animate
[More tags]
rss feed

email

root

flog archives


Disclaimer: This page is by me for me, if you are not me then please be aware of the following
I am not responsible for anything that works or does not work including files and pages made available at www.jumpstation.co.uk I am also not responsible for any information(or what you or others do with it) available at www.jumpstation.co.uk In fact I'm not responsible for anything ever, so there!

[Pay4Foss banner long]