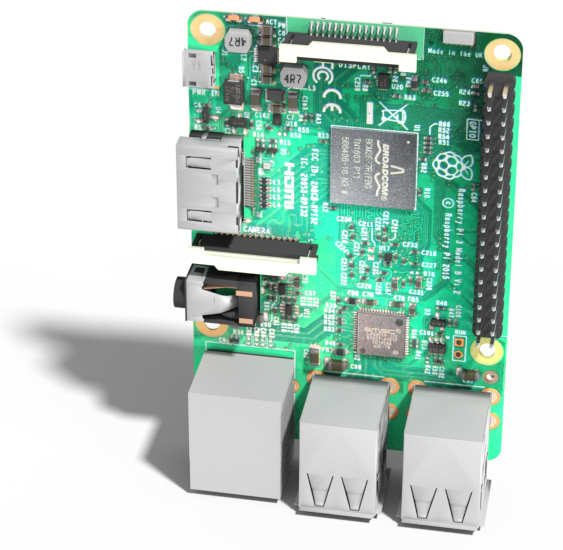
You can download, completely free, a CC0 highly detailed 3D model of the Raspberry Pi Model B 3 in .blend format. (using Blender you can export to a number of common file formats such as .obj, .fbx etc)
DOWNLOAD FROM BLENDSWAP (free account required)
37mb, 89k Verts, 83.5k Faces, 160k Tris
2:38 min
Once upon a time I needed a Raspberry Pi 2 3D model to use in a VR project. There were lots for sale or for free but with very low detail. In the end I found two that expicitly stated I could not distribute anything I made with the models (although they were free to use). Luckily the VR work was for demonstratoin purposes only and got shown to HRH Princess Anne(really!). I decided that, as no one else seemed to be interested in doing it, I would create a highly detailed and completely free model. That was back in October 2016. To be fair, this is not my day job and I was unable to do much more than a few hours a week, not to mention all the other distractions.
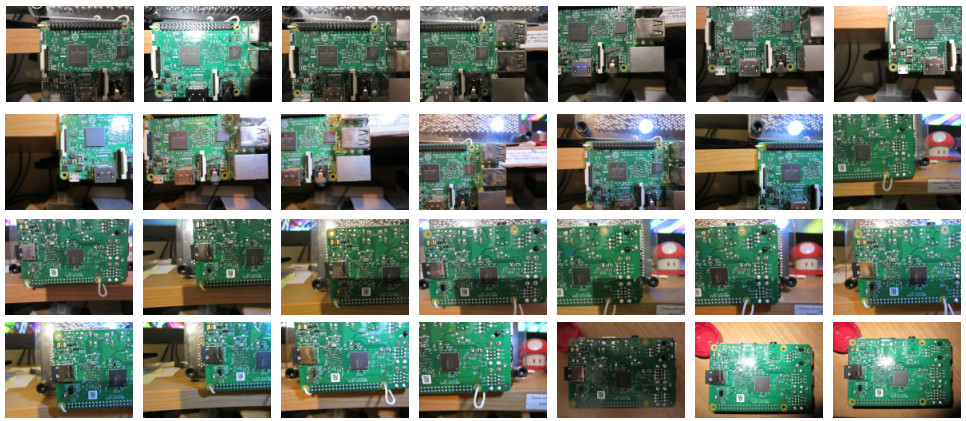
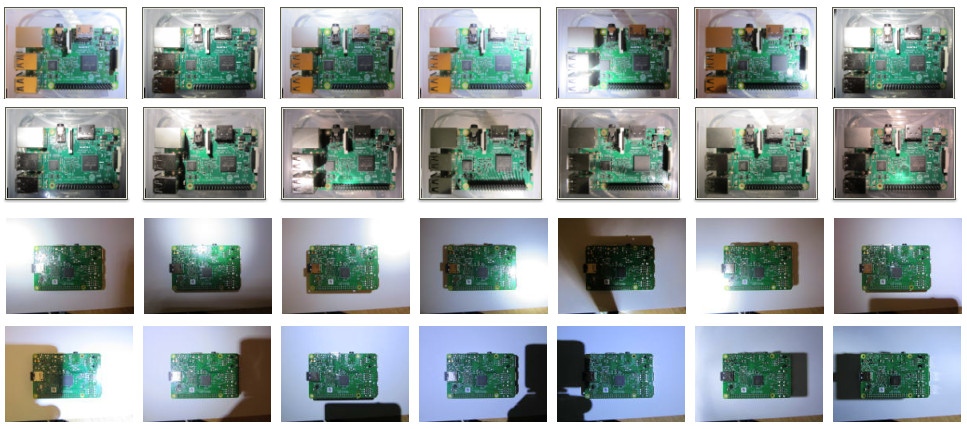
I really thought this was going to be easy. Take a few shots with a 12 Mega pixel camera, stitch them together and move on... bit more involved than that. First up to do this sort of project in a serious way you need a rig including a light-box and an expensive camera. I had neither and was balancing the camera in one hand and a LED torch in the other. The real world does not create neat overlapping photos. You will always have some mismatch through rotation, perspective, lighting, shadows, refelections or colour.
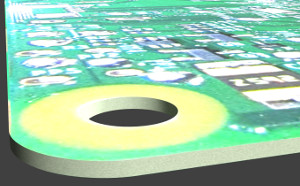
Perspective and shadows were the worst. You do not realise it, but even something as small as the USB ports on the Pi will occlude considerable chunks of the areas around them. As my light source was a hand held LED torch there was no soft global illumination. Instead harsh shadows and bright reflections blighted every image. I discovered some little GIMP tricks to aid me ( History trick Select Paths trick Clone tool trick) But really it was just time going through each photo and trying to pull all the best bits into a single unified result.
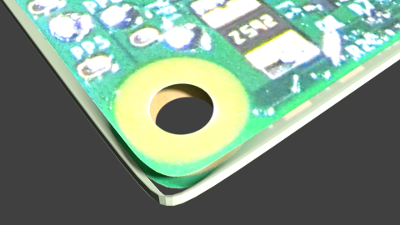
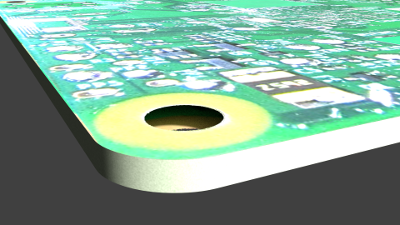
Got my hands dirty and ended up learning and using all sorts of Blender tricks. Like getting the corners and holes correct on the circuit board.

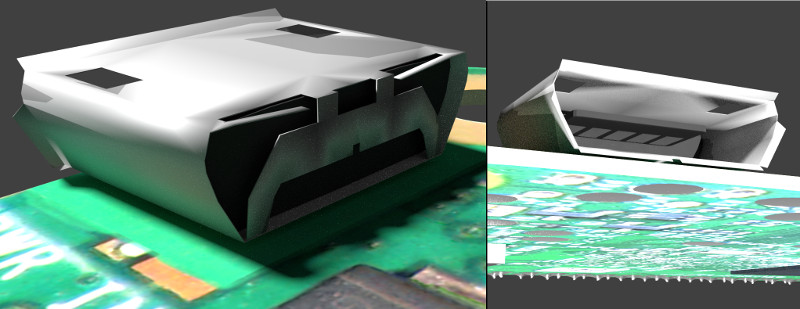
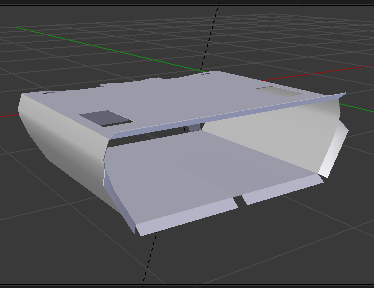
For instance the USB Power connector took about 1.5hrs to model. Started with a plane and Mirror Modifier and then just went to town extruding edges. Once the flat shape was complete I added a Solidify Modifier and the metal sheets had some depth. The Mirror Modifier is my new best friend after using it for the CSI connectors. It really is the best way to deal with symmetrical models. Autosmooth makes everything look good.

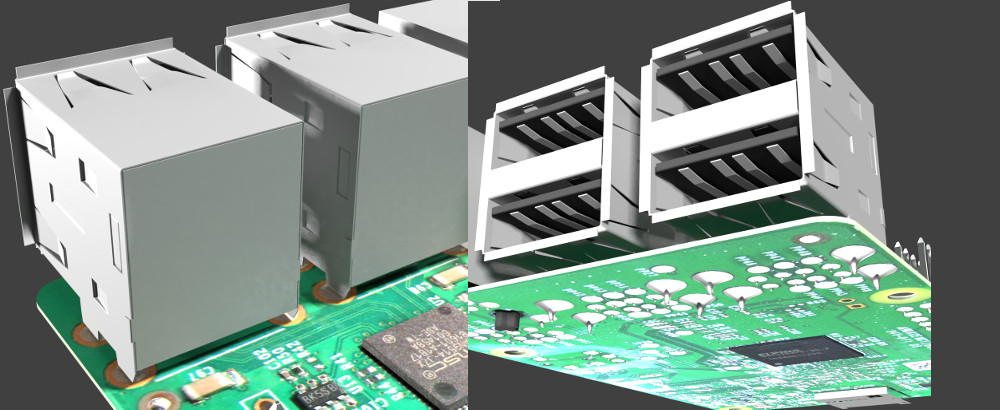
Another fun one that required learning a new technique was the fin cuts in the USB components and the side decal. The cuts were created with the Knife Project and the decal used a UV map of only the relevent faces.
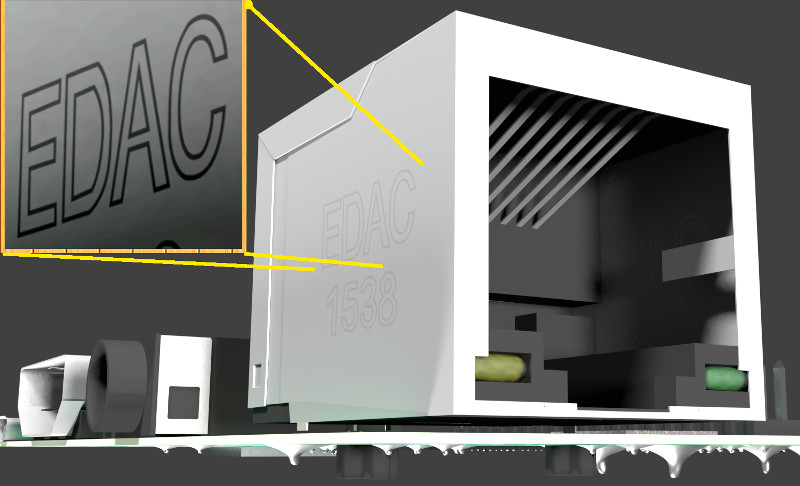
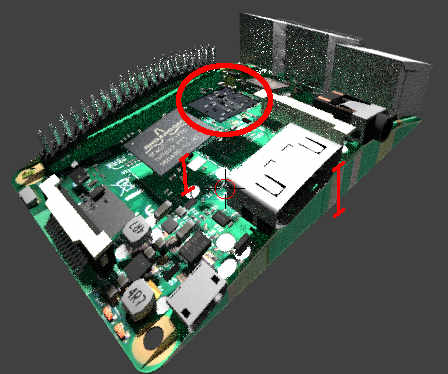
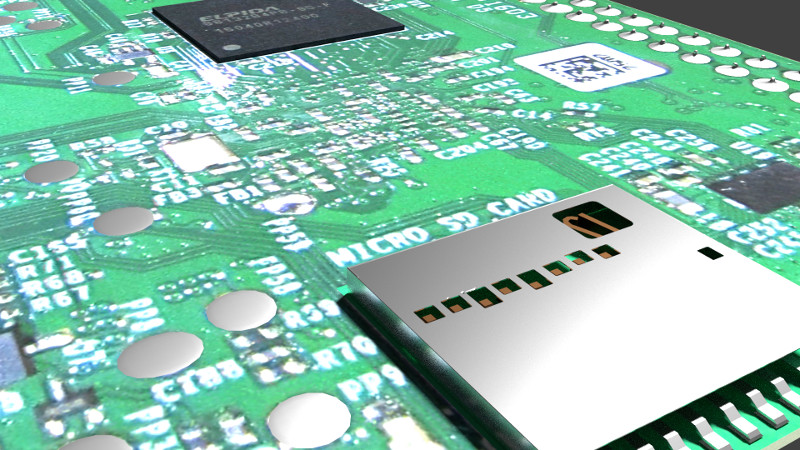
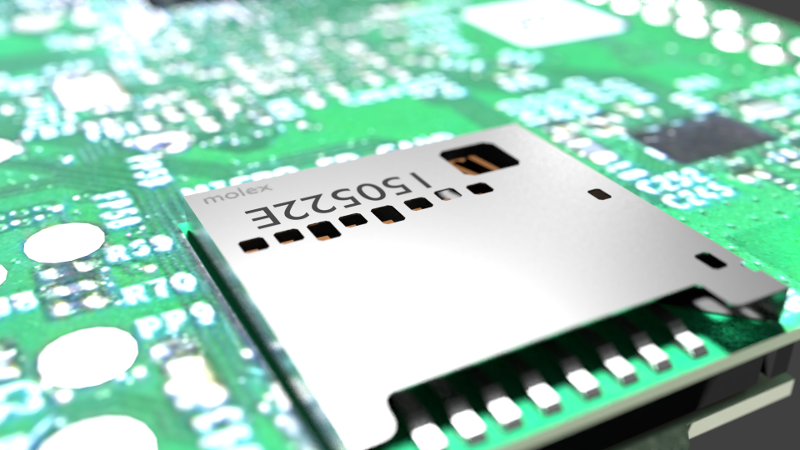
With almost 200 components to create or at least place I had to create a map of where there were still components to add/review. I had to come back to the circuit board texture many times to remove a shadow or reveal behind a fat component. Your brain cannot handle it when a 3D object that has realtime shadows from correct geometry also has static shadows from the oringating photography. Having a graphical check list provided a great incentive to just do one-more update.
To show off the building of the model I wrote a set of scripts to render the different versions I had saved periodically as I had worked. It does not look bad but it also does not give the Wow! result I had hoped for. Learnt a lot about Python and Blender. The great thing about scripting for Blender is that Blender will write most of the code for you. Just perform the steps for your script once manually and then copy and tweak the Python code output. Overview, Material library script and how I got Blender to write for me, Setup script, handling command line arguments and logic, Camera and tracking script, Render settings script and how to run it all togther As well as all that Python I did need to do a little shell scripting to splice the final animations together with ffmpeg. (video-sequence-splicer script at github)
The Raspberry Pi Foundation have now released the Raspberry Pi Model B 3+ (sucessor of the Raspberry Pi Model B 3) and have created a sales video. I used my model to create a spoof response video playing up to all the changes. It took too long to finish and the hype was gone by the time I had finished it, meaning I did not promote it. But the result was pretty impressive. All the text and effects was done directly in Blender's VSE(Video Sequence Editor). (Videos), (Sequencer setup) The main result of the Foundation releasing the new model was to spur me on to make my model good enough for the spoof video and then drive me to complete the project!
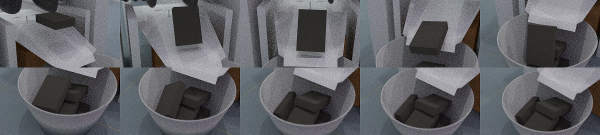
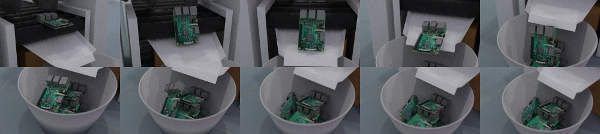
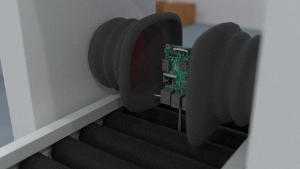
Early on in the project I imagined an animation sequence where the Raspberry Pi model would get built on a conveyor belt. I had a number of ideas in mind but paired them down to create something in a short amount of time. But this was not to be. As I demanded high resolution the per frame, this forced each tiny scene to take days to render. The big win was using simple cuboids in the physics calculations and then replacing them with Pi models after the calculations were baked. The way the board falls down the side of the bucket is pure luck. I also rendered a huge number of unnecessary frames that were cut for the final animation, more than half.

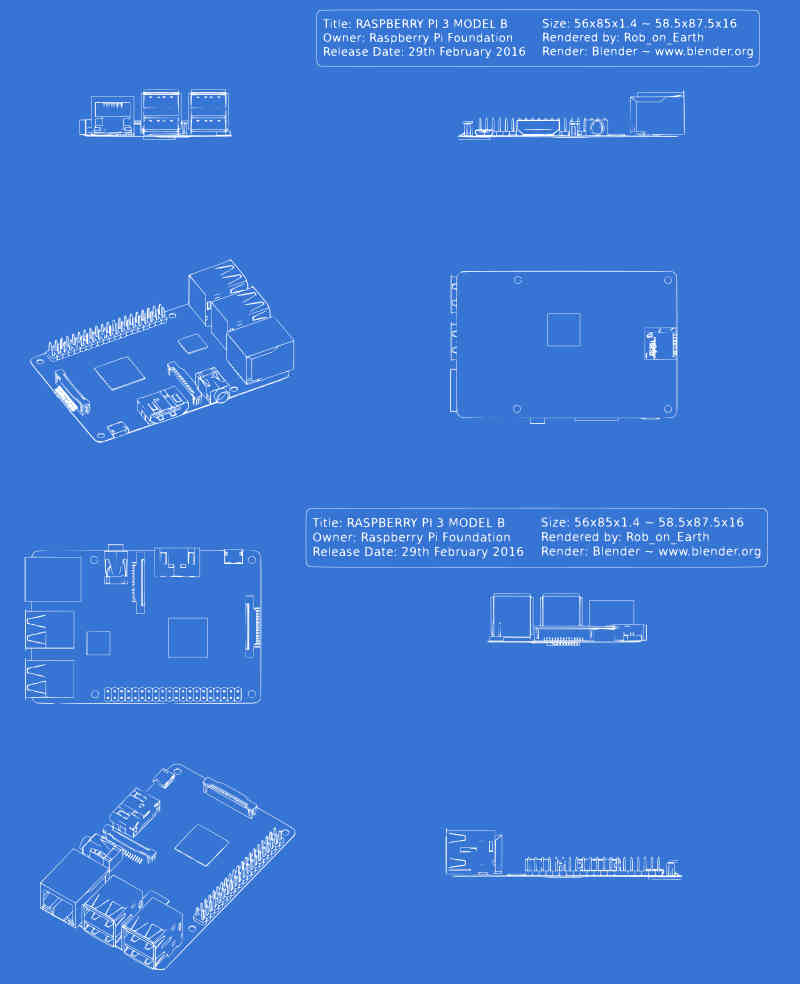
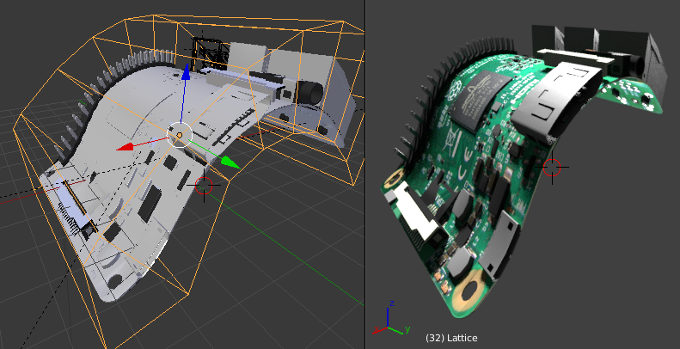
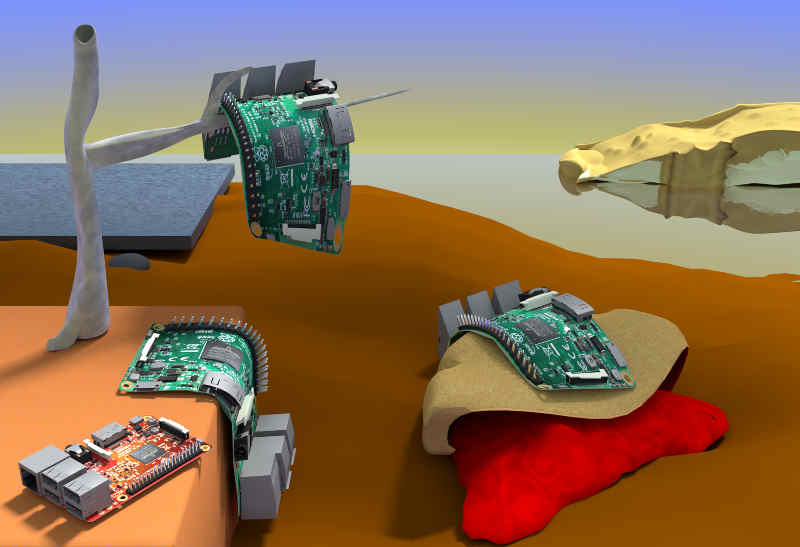
Saw this cool Blueprint add-on SB_auto-blueprint for Blender and I wondered how it was done, as it didn't do a good job with my Pi model (worked great with test/simple meshes). Ended up creating my own freestyle settings and was very impressed. The longer this project was taking, the more crazy ideas I had for extras. When I created the initial Freestyle render it unmasked a few geometry issues that had not been apparent with exisiting lighting and setup. Came up with the Dali melting clock idea umungst many others that were dropped, but this one bore into my head as a Must-Have. I like how it turned out, but it is not perfect.
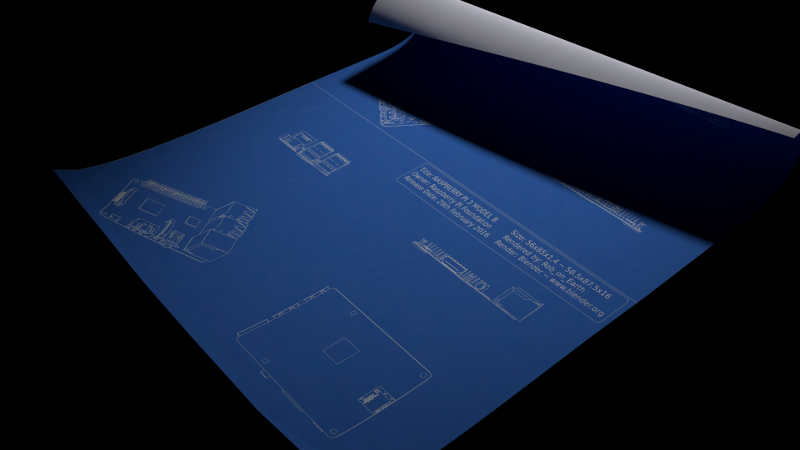
Each time I did work with the Pi model it got a little more cleaner and better optimised. I used various Python scripts to find flat shaded Meshes and then Autosmoothed them. This allowed me to Join all the Meshes in to the single Raspberry Pi model. Then I had to put all the videos together into the Showcase video. Found that I had created a title-screen ages ago when playing about with the Build Modifier. That is the Yellow text and the grey circle that grow after the Blueprints unfurl. Was seriously thinking of making my own sound track and recording sound effects, but as I have never tried that before, it was dropped.
Disclaimer:
This page is by me for me, if you are not me then please be aware of the following

I am not responsible for anything that works or does not work including files and pages made available at www.jumpstation.co.uk
I am also not responsible for any information(or what you or others do with it) available at www.jumpstation.co.uk

In fact I'm not responsible for anything ever, so there!