f-log

just another web log

16 May 2021:
blender save raspberry pi pico doorbell video advert
So I had this video ready as a fun little advert to go with the planned video describing the build and coding process of the Raspberry Pi Pico Doorbell Blender saver.

But I really didn't want it to go live just before on on April 1st, because it really works and I use it every time I use Blender!

Then I got despondent about making a coding/hardware video of Pico, but I had had so much fun making this little demo I had to get around to posting it eventually.


15 May 2021:
gentoo libigl symlink madness
Quick bit of Gentoo madness. I try and keep my Gentoo as clean as possible. No overlays, keywords lists sparse, follow all the news bulletins. Weird stuff does still occasionally happen.

Trying to do an update and libigl will not build

fatal error: Eigen/Core: No such file or directory
70 | # include <Eigen/Core>


which appears to be quite common and is fixed with
ln -s /usr/include/eigen3/Eigen /usr/include/Eigen/Eigen/


Unfortunatly that just got me to the next error


min_quad_with_fixed.h fatal error: unsupported/Eigen/SparseExtra: No such file or directory


and some mucking about with symlinks eventually resulted in the solution being
ln -s /usr/include/eigen3/unsupported /usr/include/unsupported


there was some mention of missing Eigen/Dense, but that was fixed with the first symlink.

All this because I want Cuda for Blender, I think.
03 May 2021:
benching an ender 3v2 with a optimal benchy
I tried really hard to print a Benchy, but the Ender 3v2 was not having any of it :(

The first layer would just not stay stuck to the bed. I re-levelled a few times, spending a long time tweaking each corner over and over again. Didn't make any difference. A number of commenters have noted that the bed can sometimes come or become warped. But a ruler edge showed that my bed is perfect in all directions.

What to do?

The manual mentions cleaning the bed with 70% alcohol solution, which I did not have, so a quick Amazon and 24hrs later ...

Cleaned the bed and it looked great, had a clear finish compared with the dusty covering that existed earlier. So that was that and everything worked fine, NO!

Absolutely no difference. I even wondered if it was the Benchy STL my slicer had made. But even the default dog wouldn't print.

Then I remembered something I had heard before that I had previously discounted. The Ender 3v2 has a reversible bed. One side is glass and the other is clever texture that when cooled allows prints to pop off. What I had heard was the application of a glue stick is required to get a good first layer on glass. Would it work on the Ender 3v2 surface?

YES! Benchy printed fine first attempt.

Benchy printed with all the default settings on my Ender 3v2 in just over 2 hours.
Ender 3v2 PLA printed benchy default settings in PrusaSlicer

Looking at the back and the little details. Actually looks better in person.
Ender 3v2 PLA printed benchy default settings in PrusaSlicer rear

Because of the Ender bed texture I did not think this text would come out at all.
Ender 3v2 PLA printed benchy default settings in PrusaSlicer base

This looks a bit fury, but that is just my pocket lint not printer issues.
Ender 3v2 PLA printed benchy default settings in PrusaSlicer close up

So this is on the 0.16mm OPTIMAL slicer settings with PLA and compared to many printed Benchy's is pretty much perfect.

There is some stepping on the roof, tiny bridging at the tops of the windows and portholes. There were no supports to remove and no manual clean up required at all.

I also noticed a slight horizontal bow line, but only if you get the light just right. Apparently this from the internal in-fill.

One strange side-effect of the printing a Benchy is that it is so touchable. I keep fiddling with it, as I did with the early webcam cover prints.
01 May 2021:
longest scam call to date thanks netflix amazon
Longest scam call, just over an hour.

Out of the blue get a phone call asking me to verify a new Netflix subscription. Hang up or press "speak to an operator" ? :D

Every time they changed their story I would get angry and man-splain every little thing they had told me up to that point. This happened a lot, from the fact they kept changing department, changing the amount, and even changing company, they became Amazon at one point.
Started with the first one who's only job was to get me to install Anydesk, strung him along for quite a while as I spun up a Linux VM. Was able to complain about anti-virus and network delays as I followed the Anydesk instructions to install the Linux version (enable Ubuntu repositories etc etc).

Then I was able to play along as any other victim... Except the Linux version of Anydesk doesn't want to allow unrestricted access and the options he wants me to click on a greyed out. After trying a few things I get transferred to second line.

Second line try to get me do all the same things and I can quite honestly explain that they are not working. After a few attempts to get me to install another remote desktop app, this time from a download link that is Windows only they manage to get connected to my VM with the already open Anydesk.

I get a new Anydesk window and I have to allow all sorts of settings and now I can see a bright green "Netflix" labelled mouse pointer. They take me through W3C validator to prove Netflix website has errors for my account. It's all HTML issues, but they fixate on the warning "Duplicate ID" and try and convince me that is hackers duplicating my details.

Now I get to 3rd line support and where the last two have been polite and let me ramble, this guy is curt and continually cuts me off, demanding to talk. He gets me to run the W3C validator against online banking websites and the tries to get me to login.

After a lot of me faffing about on the banking website he clicks on "login" and tells me to log in to my bank. I tell him that I need to get my details and set some music ("Infected Mushroom") and leave the room. The telephone tells me this call has been going on for 55mins so far.

When I come back he has hung up, but the Anydesk connection is still active and whoever is at the other end is bored and keeps clicking all over the online banking page and then starts routing around in the Linux applications menu.

There is a chat option in the Anydesk windows so I type "do you give up?", no response, but he has not disconnected and the Anydesk ID for his account is showing, so...

I open up the Anydesk website and casually browse around the scam reporting options and then fill in a form with his Anydesk id. At this point I can see the "Netflix" mouse arrow desperately trying to click repeatedly on the, now minimised Anydesk icon, to no avail.

After completing the report in front of him, I go back to the chat and add "Streaming on twitch". To my surprise he responds
show us
try your best


I then engage him in conversation for a good 10-15mins, with him swearing and claiming him only scammed 200 in his life and my telling him how that could be enough to put someone out on the street (I said in the snow).

I like to think that in the time I wasted at least one person was protected from being scammed.

Can I be bothered to create a fake online banking system like the scam baiters do on YouTube? Not at the moment :D
01 May 2021:
doorbell saves pico blender
I was going to put this out as video, but I was also going to have it ready at the beginning of April, so I am dumping it here now before it disappears completely.

In my previous video I detailed how to write automation code that will create render montages for saved Blender files. Blender supports making these iterative save files from the "File/Save As" menu, but it requires you to

Stop what you are doing, find the File and Save As menus then ensure the mouse is over the Save As dialog and click the [+] and then click Save. You can shortcut some of these with CTRL+SHIFT+S to bring up the dialog and press Plus on the Numpad, then Enter to avoid clicking the save button.

What if I had a single button that would do all that for me? I could get on with the fun of Blendering!

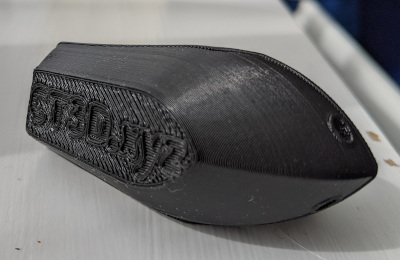
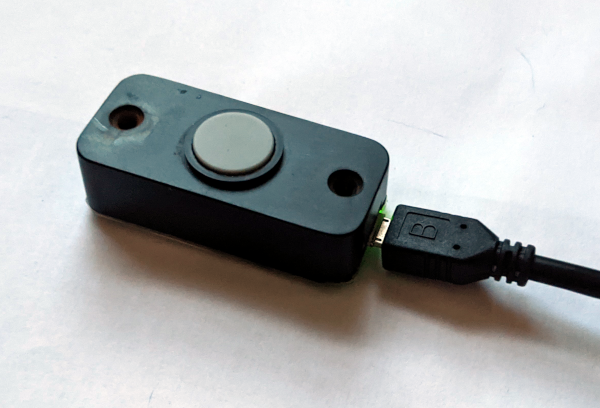
After swapping our old push button doorbell for a flashy new Ring doorbell, I had one spare 11 year old push button. I also had two Raspberry Pico boards and what would you know, they are about the same size as the doorbell casing.
Novaspirit Tech had done a couple of videos on the Pico, including using it as a fake USB mouse to cheat a mobile game. Could I get the Pico to be a USB mouse and a USB keyboard? And could I send the actions from the Pico to my Blender running machine?

Lets find out, but long story short, yes I did.

If you want to understand how I put it all together and why the mouse emulation speed is so slow keep watching going, otherwise have a nice day, you are likely to find the next bit boring.

I decided to run all the development from a Raspberry Pi 4, thinking all the tooling would be set up for minimal hassle. I regret this decision, it should have worked on any Linux machine.

I did update Thonny before starting as that is the only tool we really need.

There certainly are some other pre-requisites;

First we need to install Circuit Python that has the USB HID support
go to circuitpython.org and then select Raspberry Pi Pico

https://circuitpython.org/board/raspberry_pi_pico/

The chip on the Pico is RP2040 and I got the the latest version at the time was 6.2.0-beta.3

Adafruit CircuitPython 6.2.0-beta.3 on 2021-03-04; Raspberry Pi Pico with rp2040

Plug the Pico in while holding down the BootSel button, let go and you have a new drive attached to your computer

Drag and drop the UF2 file you just downloaded to the Pico drive and it will reboot and come back ready in less than a second.

Thonny will now be able to talk to the Pico.

Occasionally Thonny did not find the Pico first time and I had to go into settings and select it manually

Couldn't find the device automatically.
Check the connection (making sure the device is not in bootloader mode) or choose
"Configure interpreter" in the interpreter menu (bottom-right corner of the window)
to select specific port or another interpreter.


Next

we want the Adafruit USB HID library, this gives us lots of pre-written functions that make life a lot easier.

Download the NPY Release from Adafruit Github Circuit Python HID repository
https://github.com/adafruit/Adafruit_CircuitPython_HID

Unzip it and copy the lib/adafruit_hid file back onto the Pico that now has it's own lib folder, since we installed Circuit Python on it.

Now I am going to take you through the code I wrote, but you can just get it from GitHub
https://github.com/robgithub/pico_blender_doorbell

Import all our required libraries
import time #for delays
import digitalio # so we can use the Pico Pins
import board # so we can reference the Pico pins
import usb_hid # go in to USB Human Interface Device mode
from adafruit_hid.mouse import Mouse    # do mouse stuff
from adafruit_hid.keyboard import Keyboard # do keyboard stuff
from adafruit_hid.keycode import Keycode # reference all the special key codes


Move the mouse by increments with delays, bit long winded, but if you stay until the end you will find out why I put it all in.
def move_mouse_by(x, y, mouse, delay, jump):
    print("MMB({0}, {1})".format(x, y))
    while (x != 0 or y != 0):
        mx = limit(x, jump)
        my = limit(y, jump)
        mouse.move(mx, my)
        x -= mx
        y -= my
        time.sleep(delay)

        
A limit function, so that either the value passed or the maximum is returned
def limit(value, by):
    return min(by, max(-by, value))


Mousing around, move the mouse top left by the screen width and height, forcing it into a corner.
Then move it to half the width and height, ideally the middle of the screen.
def center_mouse(screen, mouse):
    move_mouse_by(-screen["width"], -screen["height"], mouse, 0, 100)
    move_mouse_by(int(screen["width"] /2), int(screen["height"] /2), mouse, 0.02, 5)


A loop that just sits and waits for the button to be pressed or wires touched

Sleeps for 10 seconds after everything has finished to avoid accidental re-saves
def button_loop(led, btn, keystrokes, keyboard, mouse, screen):
    while True:
        led.value = True
        if btn.value:
            print("Btn pressed")
            led.value = False
            do_blender_save_as(keystrokes, keyboard, screen, mouse)
            time.sleep(10)
        time.sleep(0.1)


Send our keyboard key sequence, one press at a time, including combinations
def send_keystrokes(keystrokes, keyboard, delay):
    for keystroke in keystrokes:
        if type(keystroke) is list:
            keyboard.send(*keystroke)
        else:
            keyboard.send(keystroke)
        time.sleep(delay)

        
Do the Blender Save As
coordinates calling the other mouse and keyboard functions to perform the Blender Save As process
def do_blender_save_as(keystrokes, keyboard, screen, mouse):
    center_mouse(screen, mouse)
    send_keystrokes(keystrokes, keyboard, 1)


and the main function to set everything up

Tell the Pico which pin we are using for the button and how it is wired

Tell the Pico we want to use the Power LED

Configure our key stroke patterns

define the screen size and kick off the main button loop

def main():
    # Set up a input button on GPIO Pin 15
    btn_pin = board.GP15
    btn = digitalio.DigitalInOut(btn_pin)
    btn.direction = digitalio.Direction.INPUT
    btn.pull = digitalio.Pull.DOWN

    # Set up the Pico onboard LED
    led = digitalio.DigitalInOut(board.GP25)
    led.direction = digitalio.Direction.OUTPUT
    
    # Create Mouse and Keybord devices
    mouse = Mouse(usb_hid.devices)
    keyboard = Keyboard(usb_hid.devices)
    # List the keystrokes we want to initiate on button press
    keystrokes = [[Keycode.CONTROL, Keycode.SHIFT, Keycode.S], Keycode.KEYPAD_PLUS, Keycode.ENTER]
    # define the target screen size
    screen = {"width":1920, "height":1080}
    button_loop(led, btn, keystrokes, keyboard, mouse, screen)


While writing your own code you get stuck with the Pico not responding, click in the Thonny command window and Press CTRL+C

Device is busy or does not respond. Your options:

- wait until it completes current work;
- use Ctrl+C to interrupt current work;
- use Stop/Restart to interrupt more and enter REPL.


To make sure I was sending the correct key codes from the Pico I ran xev, which shows exactly which key code are being sent.

The tricky part was the mouse movement and why it is currently so slow.
Every time I tested the mouse moving code with small jumps it seemed to to work fine, but the move to the middle of the screen would always overshoot.
I will not bore you with the details, but it turns out that nearly all modern operating systems since 2000 have had mouse acceleration curves built in.
I tried one big jump, lots of little jumps, but got the same overshoot, only when I added in significant delays did it behave.

I got to point where I was running the code over and over again and tracking what jump I was making and what pixel position the mouse was ending up at

while true; do xdotool getmouselocation;sleep 0.2;done

In theory an updated USB HID library could tell the mouse where to BE instead of where to GO and bypass this issue.

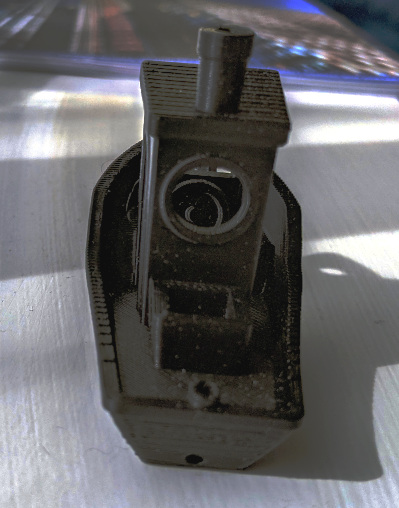
The Pico almost fitted exactly in the doorbell casing.
"Almost" was fixed with a little bit of dremeling
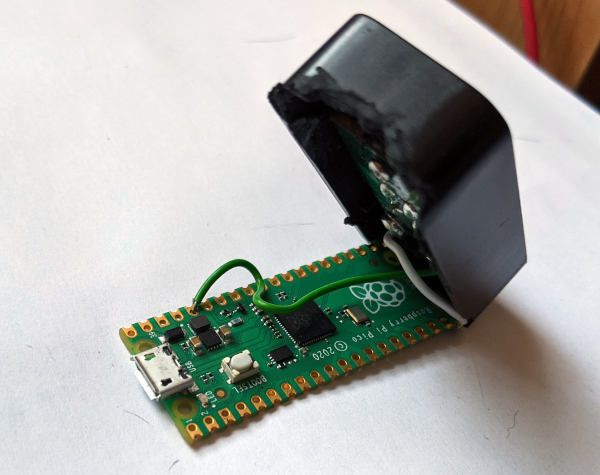
then I super glued a piece of plastic packaging over the back. Waited for it to dry out and the cut away the excess.

Cost;
Pico 3.60
Cable - had one spare
Doorbell - was going in the bin (around 3 new)
(or you can just push two wires together)

It really is a handy piece of kit and I have already used it 34 times during the making of the intro video and I intend to continue to use it for future Blenderings

photo showing raspberry pi pico inside a doorbell
photo showing raspberry pi pico powered doorbell button connected to USB


OK, so that was a bit of brain dump, but it would have made a reasonable video, just do not have the time and I do not see the value.
There were actually a load of videos and still images created for the video :D


loading results, please wait loading animateloading animateloading animate
[More tags]
rss feed

email

root

flog archives


Disclaimer: This page is by me for me, if you are not me then please be aware of the following
I am not responsible for anything that works or does not work including files and pages made available at www.jumpstation.co.uk I am also not responsible for any information(or what you or others do with it) available at www.jumpstation.co.uk In fact I'm not responsible for anything ever, so there!